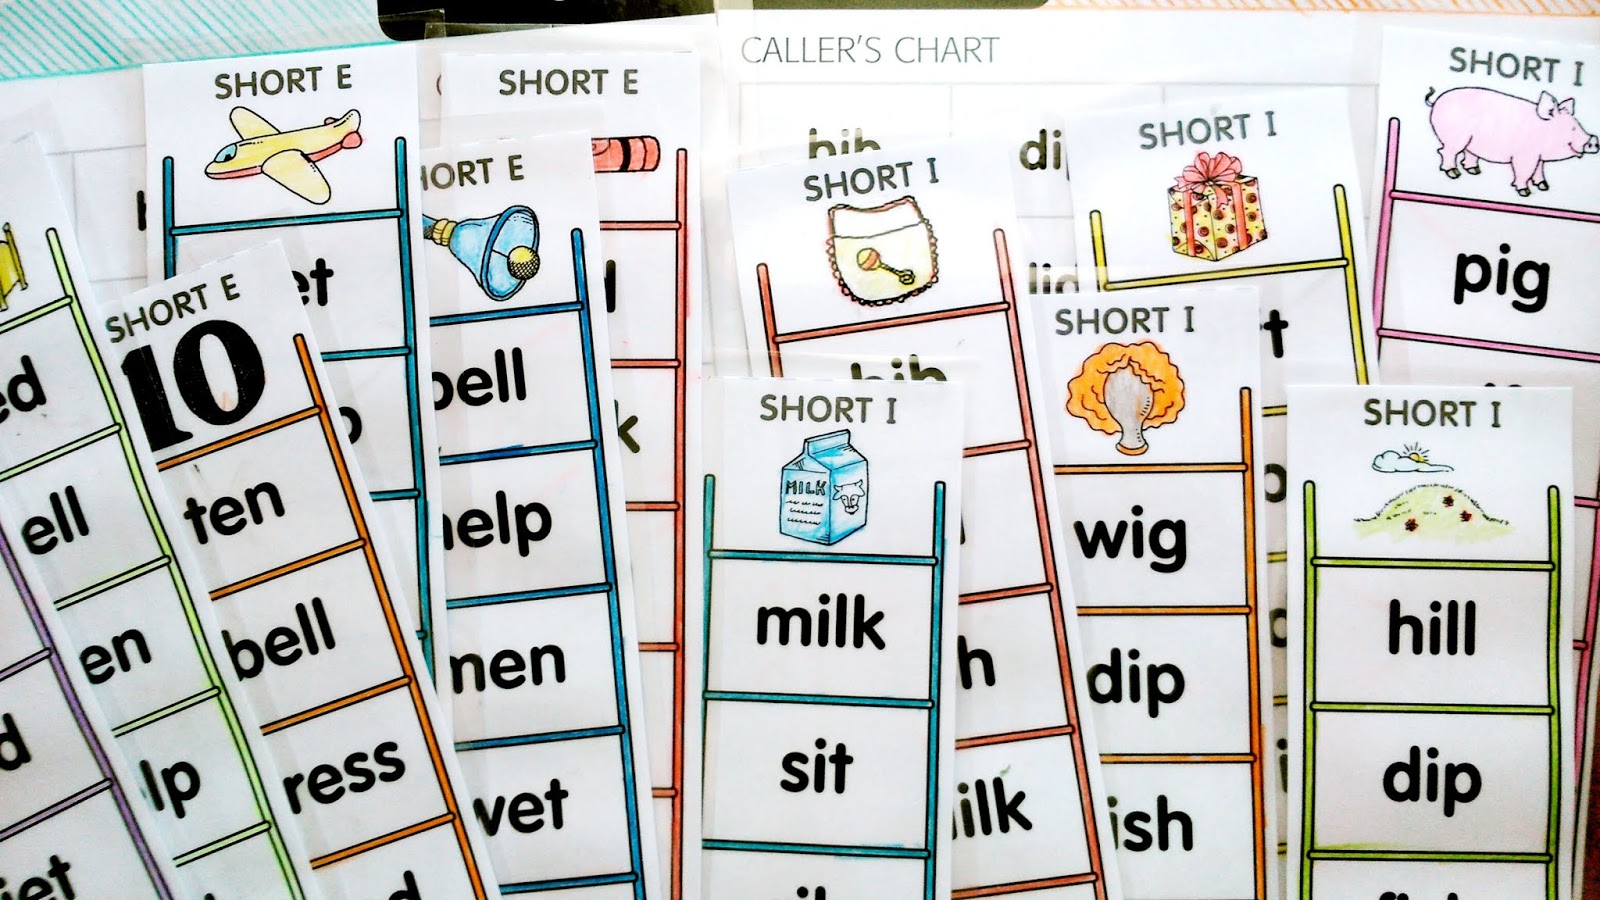
Finally, July! June's been a busy but rewarding month, so today I'm going to share some thoughts, ideas and resources to address the topic of short vowel discrimination with our children, starting with /I/ and /e/.
Short vowels are the first to be learned with the phonetic method but, while on the one hand the children recognize them visually because they associate them with the vowels of the Spanish language, on the other hand more work of auditory discrimination is necessary so that they can hear and pronounce them correctly.
I have noticed that there are pairs of sounds that Spanish speakers tend to confuse more frequently: the i and the e, the a and the lo u, and finally the o and the u.
How to do this? Once the 2 sounds have been introduced separately with the appropriate activities and games, it is necessary to point out the difference between the pair of vowels that could generate confusion.
The easiest way to operate is to give each child a letter that represents the e and another that represents the i. Then we tell them, one by one, 3 or 4 letter words with one of the two sounds we are working on; the children have to indicate with the letter what sound they have heard.
For example:
tin/ten
pin/pen
pit/pet
rid/red
miss/mess
sit/set
Ideally, this list should be combined with other words that are not written with the same consonants (net, mist, get, hiss, etc.) and presented in random order, so that the children will be able to guess correctly more easily and feel more confident when it comes to answering. There are many more in the word boxes of the Jolly Phonics© method.
Now you can create more or less fun versions of this activity: in my class we usually jump over the chart, throw balloons or run to the chart to add a little psychomotor skills to the class and thus encourage deeper learning.
What to do when a child is wrong? I tell you what I usually do: first I repeat the word with the vowel he has chosen and then I pronounce it with the correct sound, then I encourage them to repeat it themselves, taking into account the position of their lips, tongue and teeth (phonetic articulation), to finally encourage him to repeat the word correctly and show me the corresponding letter.
Over the years I have come to realize that this is a very important job because the few hours of exposure to English in a school class are not enough for children to acquire this phonemic awareness on their own. It is important to emphasize it. What the children will do is realize, little by little, the differences between the vowels in their native language and those in English.
Here is the link to the pronunciation of the /e/ sound for you to practice ;)
More about phonics on my newest page: reading and writing in English, where I have compiled and will add links to related posts.


Today I am going to briefly tell you about an option we have to present vocabulary in an effective way to the youngest children, where by youngest I mean children in preschool and first years of primary school, although, I warn you, never underestimate the fascination that a flap can have on a child's mind. It produces exactly the same expectation and excitement as waiting and opening Christmas presents, I guarantee it.
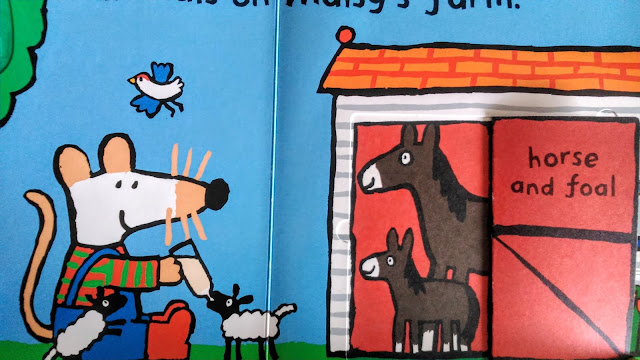
So with the excuse of the arrival - finally! - of spring, I took to class my big cardboard book about the seasons of the little mouse Maisy , which, with a lot of windows, captured the attention of all the children in the class in less than 3 seconds, as always.
Now, we all know - and if not, I'll tell you now - that when a person is interested in what they are studying they learn four times more than if he or she didn't have that interest, and precisely because of that, nowadays, so much importance is given to presenting the contents in such a way that they catch the attention of the students.
Soon everyone wanted to see what was hidden behind the flaps and I asked each child to open one and repeat the name of the animal behind it. Once the flaps were finished, I closed them again and, in order to practice a little more, I called each student to ask them where the animal was: they didn't miss a single one!
As you can understand in this second phase we work on the recognition of the word: through this exercise we create a direct link between word and image without going through the first language. That is why when you ask children who study English in school "how do you say horse in English?" They may not know how to answer right away as they never work with the translation, as I tell you in my book Mi Hijo Habla Inglés.
There are literally an infinite number of lift-the-flap books and I encourage you to try them because, in addition to having a lot of magic, they encourage active and multi-sensory learning, since children use their different senses - sight, hearing, touch - to interact with it. Moreover, as part of a story or a brief history, words are shown in meaningful contexts and this boosts a deeper learning of them.
Finally, during this type of activity, the children's speaking skills are also encouraged and, as always, when kids have fun, they lose any inhibition when it comes to speaking, repeating and trying to say their own words.
The collections that have so far been most useful to me when working on vocabulary with my students are those of Maisy, the little mouse, and Spot, the puppy, with some incursions of Peter Rabbit and Pete the Cat.
--> Quiero leer este post en castellano


 There are several theories on how to maintain order and discipline in a class of more than 1 student / child. A well-known tool is the time out, a method which nowadays is generating many debates between parents and teachers.
The Time out is a behavioral discipline tool (Pavlov's dogs and Skinner's pigeons, just to be clear), which consists of isolating the child who behaves badly and leaving him a few minutes to, supposedly, think and reflect on what he has done 'wrong'. In the classroom, time out can be translated with the use of a chair (the thinking chair) placed in an isolated corner while at home it can coincide with the option of leaving the child alone in his room for a certain time.
People who are against this measure provide reasons I'd take into account since they claim that this type of solution communicates to the child something like 'every time you make a mistake, you will be rejected and you will have to deal with your emotions by yourself.
'
Now, when you only have 1 child or 2, it may be worthwhile to look for more sensitive and constructive alternatives to solve behavioral issues, however it is clear that in a class of at least 25 students, only 1 child who does not behave properly can likely generate endless of difficult to manage problems, especially when you have a schedule to accomplish and no time to waste. Having to choose between giving a class or adequately attend to the emotional storms of your students is an undesirable situation and we often tend to opt for the quickest and most effective solution in terms of time and effort.
Anyway, all this reflection to actually tell you that I had a difficult month because of some discipline problems in my classes of 5 years, and, check this out, I only have 7 students. So the other day, after weeks of reflections and useless attempts to solve the situation, reluctantly, I informed the principal that I was going to take a chair down to the class: the thinking chair, too bad! And she told me "Ah, the calm down chair!" And I, who had already accumulated enough stress, I joked, "Yes, the calm down chair for the teacher!"
That very same moment an alternative to the thinking chair came to my mind: I decided that I was not going to force any child to sit on the wicked chair, quite the opposite, I was going to sit on it, myself. I was going to sit there and count up to 3 every time I'd noticed an inappropriate behavior going on for too long: at my 3 everyone had to stay 'quiet and still', in order not to lose any of their 3 points and, therefore, the sticker that I usually let them choose at the end of each class.
I explained everything to them at the beginning of the lesson, showing them the sign where I had written their names and finally we rehearsed it.
I'm pretty sure they took it as one more game (probably the musical statues) and it was much simpler to maintain the control of the class, without stress. Moreover, I have the impression that we all won, because on the one hand I saved a lot of energy, while on the other hand the children, although they had the chance to jump and run (being children, in the end), they were not scolded or punished since at my 3 they were all sitting around me ready to listen to the instructions of the next activity. By making them see clearly the consequences of their actions, keeping the sign with the points and their names in sight all the time, they could actively take their behavior under control.
It was a very profitable and fun class for everyone, all the time and, above all, to prepare the necessary material was not very elaborate since the sign is a laminated A4 white sheet of paper where you can write and erase names and points with markers for whiteboard.
Have a happy and relaxing Easter break!
--> Quiero leer esta entrada en castellano
More about Easter and Spring


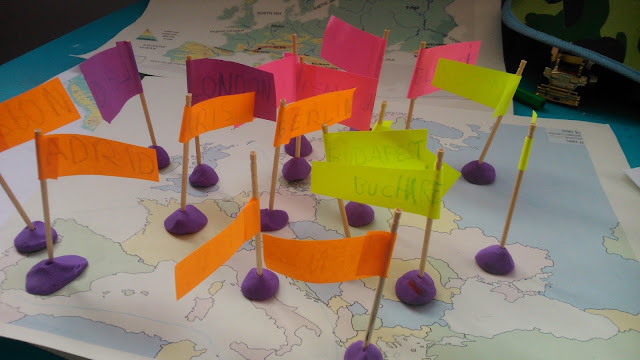 Hi there! Today's post is about how I managed to help my students learn about European countries and their respective capital cities (in English) in a very pleasant and effective way. I imagine that you can use this same method for any list of countries you'd like your students to know.
The most complicated part of this task is that it's totally abstract and quite far from the everyday life of our 8-year-old students. In addition, knowing the capitals (in this case in English) also means knowing the name of the country (also in English) where each one is located and, if that was not enough, it also means being able to locate them on a blank political map. For a student's point of view, studying for this exam can turn into an exhausting and very uninteresting job or, to be quite frank, into a torture.
As usual, the first thing I looked for was a catchy song that mentioned most of states we needed to learn: The Europe Map Song (Obertopian).
In this phase the trick isn't to learn the song by heart; instead, while the music is playing, the child should try to identify the mentioned nations on the blank map by pointing to them with their fingers, as if they were playing the piano: this way they are almost working with all their senses - through the coordination between hearing, sight and touch - which generates a deeper learning. In fact, this coordination allows the brain to establish connections, or synapses, between its neurons, according to Neuroscience and as Maria Montessori intuited*, and, at the same time, we are creating a 'muscular memory' too (actually it is a process known as myelination of the neural pathways that gives athletes and artists the advantage thanks to faster and more efficient neural pathways): the more we practice, the faster and better we solve the task.
Usually children find this exercise pretty entertaining and consequently, just by listening to our song a few times, the location of the different countries on the map was quickly under control, and therefore we could move to phase 2: the capitals (!!!!)
In this second phase we prepared a bingo: first we divided Europe into different areas: we had the English-speaking islands, the Mediterranean area, Central Europe, Eastern Europe and Northern Europe (better known among kids as FROZEN Land ahahhaha). Then we associate a color to each area and we made some little flags - with post-its and toothpicks, as you can see in the photo - where we wrote the names of the capital cities. Then we prepared some plasticine pedestals where we could pin the little flags as they were being taken out from a container and finally we could play our homemade Capitals of Europe bingo!
* Maria Montessori designed sandpaper letters in order to allow the child to "play" the sound - by tracing the letters with his index finger first and with a stick, as big as a pencil, later - and build a muscular memory of the shape of the letter that one day he will write.
Natural Science: The Life Cycle of a Dandelion and The Erbarium
-->Quiero leer esta entrada en castellano


 Short vowels are the first to be learned with the phonetic method but, while on the one hand the children recognize them visually because they associate them with the vowels of the Spanish language, on the other hand more work of auditory discrimination is necessary so that they can hear and pronounce them correctly.